Know How... 92 (Transcript)
Netcasts you love, from people you trust. This is Twit! Bandwidth for Know How is brought to you by Cachefly, at Cachefly.com
This episode of Know How is brought to you by Lynda.com. Learn what you want, when you want, with access to over 2400 high quality online courses, all for one low monthly price. To try it free for seven days, visit Lynda.com/knowhow.
Father Robert Ballecer: Today on Know How, we’re going to learn all about drones hauling around some WIFI, ten tips that you’ve been waiting for, a little bit of a camera top monitor; and also a special super secret tip for Adobe Premiere Pro. Welcome to Know How it’s the twit show where we build and break and upgrade. I’m Father Robert Ballecer.
Bryan Burnett: And I’m Bryan Burnett.
Fr. Robert: For next half hour or so we’re going to take you around some projects that we’ve been playing with to… we’ll let you geek out in the real world.
Bryan: The real world... because we don’t geek out in the real world at all usually. Outside?
Fr. Robert: In the real world, I’m fat.
Bryan: Yea, I know. It’s scary.
Fr. Robert: In the virtual world I’m like… yea it’s awesome.
Bryan: Well you know they say the cameras add a few pounds anyway.
Fr. Robert: I have like, yea every camera adds 10 pounds. So sad. But you know before we get to the geeking out, there’s actually been a couple of news stories that I thought might make for an interesting banter segment. You want to talk a little about WIFI?
Bryan: Yea, yea yea. So you were talking to me about how the Air Force was going to use drones to do hotspots, WIFI hotspots?
Fr. Robert: Yea so there was a story in Wired and a couple of other outlets over the weekend about how the United States Air Force is looking at repurposing older drones. Those first generation drones. You know the ones that they first started flying around and they look kind of like model planes.
Bryan: Right, right.
Fr. Robert: The drones of today are ridiculous. I mean they’re so… they’re basically like Boeing 777s compared to the Flyer from Kitty Hawk.
Bryan: So the evolution of drones has accelerated. They’re like cell phones. After a couple of years the new one’s out.
Fr. Robert: Right, right. And so the military is like wait a minute. We’ve got a bunch of these older drones that are still really good. They’re very very capable. It’s just they don’t have the stealth. It doesn’t have all the cool stuff.
Bryan: They don’t want them collecting dust and it’s not like they can use them to spy on citizens yet so.
Fr. Robert: The funny part is they can’t even use them for target practice. What they do with some of the older fighter jets, they blow them up. They equip them with automation so they can test out missile systems and gun systems.
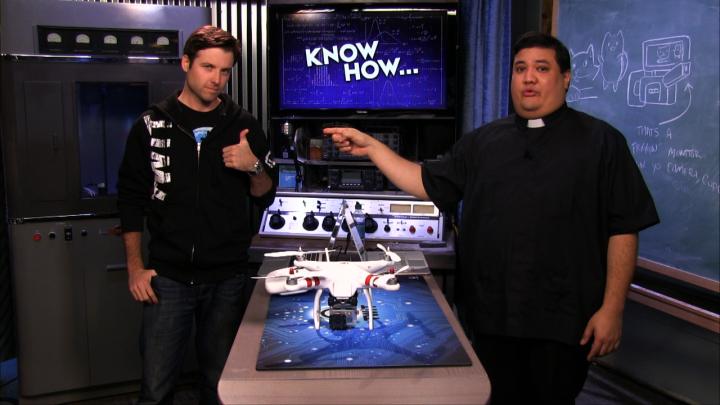
Bryan: So we have our own little drone here and when this one breaks or when we get a new one can we blow it up?
Fr. Robert: No, no.
Bryan: Okay. I’ll probably crash it again before that happens.
Fr. Robert: I think everyone’s taken a turn at crashing this thing. But the difference between this drone and what the United States Air Force is trying to do with their drones is they’re actually developing a technology or pumping $2.7M over the next four years into a computer science department at the University of Buffalo to develop what’s called cognitive radio.
Bryan: Okay cognitive radio, that just makes me think of a really smart radio.
Fr. Robert: Basically yea it’s just like the title sounds. So when we use wireless in either the 2.4 or the 5GHz spectrum, what we’re basically doing is we’re hoping that no one else is talking on the same frequency at the same time.
Bryan: Right, and because the way the FCC has done things, they’ve segregated certain allotments of spectrum for certain devices.
Fr. Robert: Exactly. In the 2.4GHz range, there’s really only three channels that you can speak on, speak in. In the 5GHz range, you have up to 23 channels that you can speak in. But even then you’re assuming that no one’s going to end up on the same channel at the same time, transmitting data in the same pulse. Because what’s going to happen is you collide and you have to retransmit. That’s interference. Well cognitive radio is actually a way to increase the number of devices that are active within a particular spectrum of RF energy, without having to worry about all that interference, all that collision.
Bryan: Right because effectively it can switch between any spectrum depending on which it needs to maintain a good connection.
Fr. Robert: Exactly. It’s agile , it’s smart radio. So what you do is if you could properly develop this technology, this cognitive radio, you have a bunch of devices that are aware of all the other devices in the network. So it knows, okay so I’ve got a little bit of space here in the 2.4GHz range, a little bit of space in the 5GHz range. Maybe some of these other ranges that the FCC opens up, I’m going to use as much of that as possible. But when I start to get interference, I just jump away.
Bryan: Right.
Fr. Robert: It’s kind of like what Bluetooth is supposed to be like. But a much higher power.
Bryan: So effectively, they can make these hotspots that you can’t interfere with. And you get a great internet connection, and no interference.
Fr. Robert: That’s why the United States military is interested because with the increase of drone use, they would love a technology that is absolutely impenetrable by jamming. If you could create a smart device or a smart set of devices that have the ability to automatically jump away from whatever interference there may be then you increase the capabilities of your drones. Now they’re going one step further. This is the cool thing. You could actually mesh these things.
Bryan: Right and create like a large network in an area that doesn’t have any.
Fr. Robert: Right, instant network. So right now what they do is to communicate with drones that are going up to satellites and they’re coming back down from satellites down to the drones, right?
Bryan: Right.
Fr. Robert: Well with this there’s a lot of latency there. It’s not exactly real-time control. If you had a mesh of intelligent controlled drones, with intelligent cognitive radios in them, you could send up like a fleet of drones and they would communicate with each other. It’s just like a miniature internet. They’re all bouncing packets off of each other in whatever frequencies they can find so that there’s always a communication path from any device to any device. Extend that one step further down to the ground and now people could have a super-high speed network that is supported by drones circling over them.
Bryan: That is super cool, a little scary. Imagining a fleet of drones up in the air doing something like that. But what’s cool is Google is already doing something pretty similar.
Fr. Robert: Yes.
Bryan: But they’re doing it with balloons.
Fr. Robert: Right, so what was the project called?
Bryan: It’s called Project Loon and I put the link in the dock, and Google has been working on this for awhile and it’s basically sending up balloons in areas that don’t have internet and using the different wind currents in the atmosphere to provide internet to places that don’t have it. And because ground internet connections are pretty expensive and harder to maintain, balloons is a cheap way of providing the infrastructure that they need for providing internet.
Fr. Robert: Right, right. In what balloons provide, what Project Loon provides is this loiter time. Right? Because even with drones, even with these long-lasting drones that can hover, even if they’re solar powered… some of more advanced ones can loiter over an area for 48 hours. But with a balloon, since you’re really only limited by the lift that the balloon itself is generating, you can get loiter time in weeks, months.
Bryan: Right, and they can skip between the air currents too so they could move in a few miles in one direction and then move to another current and raise and lower itself.
Fr. Robert: When I was still hot-air-ballooning in St. Louis that’s how you control your balloon. You know that the wind is going in this direction with the South at up to this altitude. And then right above that it’s going from South to North so you know that if you do this little circle, altitude circle, you’ll just go back and forth back and forth and all you have to do is either inflate or deflate your balloon.
Bryan: Yea, it’s a pretty cool idea.
Fr. Robert: So combine Loon with cognitive radio.
Bryan: Yea, exactly. So that’s where probably will mean for the consumer in the future. Maybe we’ll just have wireless internet.
Fr. Robert: Anything that can give me sort of access at a moment’s notice, it’s sort of the network on demand. That’s kind of the next frontier for geeks. I mean, it’s nice to have your hardwired network but what we’ve all realized is sometimes as you mentioned it’s difficult to get a hard line out. Conventional wireless is not going to work so well. So if you’ve got something like a Project Loon, if you’ve got something like a fleet of mesh drones, a swarm of drones, then you can do some interesting things.
Bryan: The idea of cognitive radio has been around for a long time. But it’s not until now that we have the technology where things have shrunk where we can actually take advantage of it.
Fr. Robert: Because you have to build the smarts in. And the smarts mean processing power. And processing power uses space and power, so this way we finally have the tech to shrink it down to like a postage stamp. And get all the smarts in there.
Bryan: So that’s when Skynet was born.
Fr. Robert: And now we’re all going to die thanks to the rise of the machines. You know speaking of the rise of the machines, the way that you fight that rise is that you stay smarter than the machines.
Bryan: And that’s not easy to do.
Fr. Robert: That’s not easy to do.
Bryan: But there’s something that will make it easier.
Fr. Robert: I think so, specifically we’re talking about Lynda right?
Bryan: That’s right. They have plenty of stuff to keep your knowledge going on.
Fr. Robert: That’s right. Lynda helps you keep one step ahead of Skynet. And so that’s why we’re so happy to have Lynda as a supporter of Know How. Now, the question is what do you want to do in this coming year? Do you want to learn a little about photography? Maybe a little about Adobe Premiere. Maybe you need some business skills to apply for that next job. Or maybe you’re just like Bryan and myself and you just like knowledge. You like flipping through a text book. You like looking through the encyclopedia. You like surfing the internet to find new things. Well folks, that’s what Lynda is all about.
Bryan: Stay ahead of the drones.
Fr. Robert: Stay ahead of the drones. Now Lynda is an online learning company. With Lynda.com, you can receive unlimited access to thousands of online video courses that cover a variety of software, creative, and business skills. For example, on Arduino, you can start programming interactive objects with Arduino Uno, the open-source single-board micro-controller. Which is the smarts that go into devices like these drones. You can also learn how to set up your Go Pro Hero to start capturing stills, video, or even time-lapse; or how to get great sports footage. There’s also a course on black magic cameras which is where it’s at in the 4K arena. When you can get to know the features of the popular cinema and production for the cameras, and you can decide if the black magic camera is right for you. And if you’re interested in 3D printing and really who isn’t, you can learn the basics of what 3D printing is, and how you can use it to create objects from prototypes to working tools. Now I’ve been using Lynda over the last couple of months to brush up on my skills. Forbes for Know How and for Coding 101, for example I used it for Adobe Premiere. Because there were a lot of things that I may have learned but I kind of forgotten over the years. Or I need a brush up for how to do them in the new version of Adobe Premiere.
Bryan: Right, right. And for example here, TWiT, we’re switching over from 7 to Premiere which I’ve used but I get a little rusty.
Fr. Robert: Right, and it’s always nice to have that reference, that online help book that’s never further than a few clicks away on your keyboard. Now Lynda has over 2400 courses with more added weekly. All Lynda.com courses are produced at the highest quality. These aren’t those homemade videos on YouTube which are great because we love YouTube. We love the content creator, but sometimes you don’t want to have to worry about the wiring or a bad camera angle. Or horrible audio, you just want the content.
Bryan: The only thing I have against YouTube, is I’ll watch part one of a video and then it’s like part one finished, where’s the next one? And then it shows me the suggested links as part seven.
Fr. Robert: I will say that when I was creating tutorials, I kind of liked doing that. I could skip part one, part two, and part six.
Bryan: I’ll get to the other ones later. Let those YouTube guys figure it out.
Fr. Robert: Now Lynda.com works with software companies that provide you with updated training the same day the new versions hit the market. I was talking about the new Premiere, so you always have the latest skills. At Lynda.com, the instructors are accomplished professionals at the top of their fields. And they’re passionate about teaching. These aren’t people that just know the book learning, they’ve actually been in the field. They’ve actually done the skill set they’re teaching. That’s why it’s always so wonderful to watch them and passionately to learn these skills. You get courses for all experience levels from beginner to intermediate, and advanced. And you can watch from your computer, your tablet, or your mobile device. Whether you have 15 minutes or 15 hours, each course is structured so that you can learn from start to finish. You can also search the transcripts to have quick answers, which is what I love. You don’t have to scroll through an entire video, you can look at the transcript and find the exact question you were looking for and jump right to that part of the video. It’s part of the Lynda difference. Lynda.com also offers certificates of completion when you finish a course which means you can publish it to your LinkedIn profile. So that people know that you’ve actually done training in that field. So here’s what we want you to do. We know that you love knowledge as much as we do. So we want you to learn something new with Lynda.com. It’s only $25 a month for access to the entire Lynda.com course library. Or for $37.50 a month, you can subscribe to the premium plan which includes exercise files that let you follow along with instructors’ projects using the exact same assets. And you can try Lynda.com right now with a free seven-day trial. Visit Lynda.com/knowhow to access the entire library. That’s over 2400 courses free for seven days. It’s all at Lynda.com/knowhow. And we thank Lynda for their support of Know How. Bryan, this is the time where we’re going to start talking about Mac OS10 tips right?
Bryan: That’s right. Do we have enough time for that though?
Alex: I think we can do it this time. Yea if we do it quick.
Fr. Robert: If that’s the case now we can bring them into the knowledge, what do you say?
Bryan: I just want to preface that nothing’s going to blow your mind about this. These are tips that I’ve picked up after the years of working at TWiT. Because when I first came here I never used Macs. So it was a learning experience for me and these are a few things that I’ve picked up. Nothing crazy, but some things you might not know.
Fr. Robert: Way to sell that Bryan.
Bryan: So the first quick tip is going to be using QuickTime to do a video or audio recording. Without it, I wouldn’t be able to do this review. So the first step would be to open QuickTime. Go to file, choose audio or video recording. The right hand side of the tab shows you what options you have. And as I’m doing in a one-two-three button, you can start recording. Now as I am doing a video recording at the moment, I can’t do an audio recording. But if you hit the stop button at the top, you will see a window showing what you’ve just recorded. Now when you go to close that file, you have an option to export as and name it. Also you can add a tag if you’d like and put it in whatever file destination you want. And for myself, I’ll be doing desktop, and that’s how you save it. Now you’ve got yourself a screen recording that you can use to do tips or something like that. Next is kind of silly but if you hold the shift button while clicking on something that does an animation, you can slow it down. It doesn’t really serve a purpose but one of those nifty things that you pick up using Macs after awhile. And it’s kind of nice to see how the animation looks. Another tip which isn’t Mac specific, but if you wanted to zoom in on a website or something like that, you can hold command and plus or minus to zoom in and out. That comes in handy when trying to view small texts. The next one, it doesn’t matter if you’re on a Mac or PC, applications freeze. Now typically you can hold down command, alt, escape and you will be approached with a dialogue box that will force close whatever program you want. But a quicker way is to go up to the Apple button at the top-left corner and hold shift. Now where it normally just says force quit, it will appear with the program that you want to quit. So just hold shift and force quit, and it closes the program right away without having to go into the dialogue box. Another hidden option is if you go to the Apple button at the top and hold the option key down, you’ll see that the ellipses disappear when you hold them. Now when you see the ellipse that means that a dialogue box will open up for whatever you’re going to open. But if you hold down the option, it will either go straight into the program or give you different hidden options that you normally wouldn’t see without holding the button. Now this also works for the volume rocker. If you just left-click on, you’ll see the slider. But when you hold the option when you click on it, it gives you all the different options for internal microphone or different speakers that you’d like to use. This also works on the WIFI button. If you just click on it, it will show what WIFI connection you’re connected to. But if you hold the option, it will show you all the details of that network. Now sometimes you want to move around the icons at the top-right hand corner. This is one that bugged me for a long time when I started using Macs. But if you hold down command and left-click, you can drag the icons around or you even move them completely off the menu bar and make them disappear. This only works with the default Apple icons. So the third-party apps like Dropbox that you see there, or Google Drive you can’t move those around. But if you do accidentally drag one of your icons off of the menu bar you can always go back into your settings and find the particular one that’s missing. And there’s usually a show button option at the bottom of the dialogue box. Here’s a couple quick tips if your Mac seems to be running a little slow. The first thing to do would be to see what items are booting up when you first turn on your Mac. So for instance, I have iTunes helper, Dropbox, Google Chrome, Adobe Photoshop, and for Chrome and Adobe I don’t really want those booting up when the PC starts up. So I’ll just deselect them and make them go away. And that way there’s less things opening when I turn on my Mac. Now if you accidentally move something or you do want something to boot up when you turn on your Mac, you just hit the plus button and you can go through your applications and add them to the list. The next thing to check if your Mac seems to be running a little slow, is permissions. There’s a couple ways to get there but I’ll go into Applications and the program you want to open is Disk Utility. Once you have Disk Utility open, you’ll select your hard drive and down at the first aid tab you’ll see Verified Disk Permissions. Click that button and it will do a quick scan of the permissions on your Mac and it usually takes a couple minutes to get through. And you’ll see here I have a list of permissions that need to be repaired. This can happen over time through updates and new installations and things like that. Nothing to be too concerned about but it could be giving you errors or slowing down your Mac. So after you’ve run Verified Disk Permissions, you just simply click repair disk permissions and again it will take a couple minutes to go through. My permissions are taken care of, we can move on to the next step. I’ve been using C-Cleaner for a few years on my PC and it works just as well on the Mac. It’s a program that you can download to kind of streamline some of the options that were already shown to you all in one program. It will also analyze and delete any unnecessary files that you have like your internet history or cookies or even your trash. So it’s a good way of getting rid of unnecessary clutter that could be slowing down your Mac. It also comes with a couple of tools incorporated into the software. You could uninstall programs from here. You can also click on Startup and see what programs are starting up with the Mac. And you can also repair permissions through it. Erasing free space, you could do that but it would take a long time and not really necessary. And that’s the end of the tips.
Fr. Robert: So you can do all that, or you could just get a PC.
Bryan: Hardee har har. Maybe people don’t want to do that.
Fr. Robert: Now we’re seeing a lot of comments in the chat room as we’re going along. And they hate you.
Bryan: I don’t blame them, honestly. I’m used to it now, where after working with you, I’ve seen what you have to go through.
Fr. Robert: I will say that you’ve given them the OS10 tips. I think next episode we’ll give them Windows 8.1 tips that we told them we were going to do three weeks ago.
Bryan: Right, because we tease those… yea, couple weeks ago. And we still did my tips before yours.
Fr. Robert: Well what you probably need to do is probably stop talking so much so we can actually get through…
Bryan: I blame Alex. He’s gone mad with power and he doesn’t let us do stuff. We just blame him for things.
Fr. Robert: This is what we deal with every week.
Bryan: Onto the next thing.
Fr. Robert: Okay, so now we have a little bit of that out of the way. When we come back we’re going to actually be talking about this stuff, a few tips I’ve picked up over the years about shooting multi-camera setups and shooting single-camera setups but a bit more accurately you can get with the built-in screens on your camcorders. But before that, I thought now might be a good time to answer a question. I got an email. I don’t get a lot of these because most people don’t have my…
Bryan: You never answer my emails.
Fr. Robert: Someone did find my real email and she emailed me and she asked me this: she said Father Robert, thank you for your know how Adobe Premiere lessons. I bought an educational discount copy of CX6 and I’ve really enjoyed following your examples. I’ve already created a few videos for my family and now I’m turning my attention to YouTube. Quick question, I’ve created a few videos that I want to turn into animated GIFs. Is there a program you can suggest for doing that? Free would be preferred but anything within a student budget should work. From Melody in Manila Philippines. Oh and she also wrote P.S. You are way more attractive than Bryan. I mean he may have those boyish good looks and dodge-like reflexes but he can’t match your priestly mojo.
Bryan: Well I can’t argue with that.
Fr. Robert: That was totally in there.
Bryan: I’m sure that was in there.
Fr. Robert: Okay okay, Melody. Good question and actually good answer for you. Which is, it’s not just free, you already have it. You said you’ve been using Adobe Premiere. And believe it or not, every version of Premiere from CS4 on up has a tool built into it that will let you make animated GIFs. Alex, if you could go ahead and go to my computer. What we have here are two shots that I took from Netflix. This was just using the snipping tool that’s built into Windows. As you can see, I’m a big fan of Doctor Who so I just chose the Angel of Tides—it’s a pretty statue right? So this will work with anything. You may have assembled a video down in your timeline here. Anything you put down there can be turned into an animated GIF. But remember the longer you make the video the larger the animated GIF is going to get. So in this case I just want two frames. I took this shot off of Netflix. I’m going to put it down here. And I’m going to stretch it for, I don’t know, let’s say 10 seconds. This is sort of a startle thing. So what I’ve done is this is what the first frame is going to look like. This is my preview and this is my monitor. This is what it’s actually going to look like when we’re done. Then I have my second frame which looks like this. This is the Angel doing the Angel thing—she’s a little mad.
Bryan: Don’t blink.
Fr. Robert: Don’t blink. Exactly. I’m going to drag it down here. Now I’m going to do a little trickery on this frame. What I’d like is I’d like to get a smooth transition between that first frame and the second frame so I’m going to go from that to that. I actually wanted to get closer not further away.
Bryan: So can you zoom it?
Fr. Robert: Yea, so what I’m going to do is I’m going to jump into my effects and I’m going to bring that up a tiny tab. So now the transition will look more like this.
Bryan: Like it’s jumping at you.
Fr. Robert: Just a little bit of a jump right. But I don’t want it to go because right now if I go real-time, it will stay like that for like three seconds. That’s a bit too long. An animated GIF—it’s just going to loop and it’s kind of nice to leave a frame in there very briefly just so people are enticed to watch it again when they miss it.
Bryan: So is the GIF going to play as long as the time that you have on the timeline?
Fr. Robert: Exactly right. So this is in real-time so if I set this first frame for 10 seconds, it’s going to hold that frame for 10 seconds in the animated GIF and then it’s going to jump and then loop again. What I’m going to do is drag this so it’s very brief so in real-time it will look more like… even that, too long. So let’s go ahead and really drag this thing down. Let’s take it all the way so it’s just like a momentary guess. For the Doctor Who fans, what we’re trying to simulate is… when you blink now you’re gone. Now we’re getting kind of scary. Well this is just what video editing in Premiere looks like. Here’s the cool thing. You don’t have to buy any additional tools to turn this into an animated GIF. All you have to do is export. Go ahead and go back to my screen. We’ve got our sequence, our clip selected here. And we’re going to go ahead and export: file, export, media. And I’m going to get this screen coming up. These are the presets. These allow me to select exactly what I’m going to be doing once I export this video. I’m not going to choose H2C4 or any of that. There’s actually a setting for animated GIF. This is built into Adobe Premiere, which I kind of like. You actually get more presets in CS 5.5 than 6, but here it’s going to create a picture that’s 320 by 440, 10 frames per second. Once I do that and go in an export, it’s going to create an animated GIF that will look a little something like… let’s go to my plus page. I uploaded last night.
Bryan: So of course I was laying in bed when I saw this, about to fall asleep.
Fr. Robert: Why do you think I posted it at night?
Bryan: Thanks, appreciate that.
Fr. Robert: So, this is the picture that I uploaded so the cool thing about this is that I actually primed people for this. I actually uploaded an angel picture earlier in the week and now I asked people to stare at it for 10 seconds.
Bryan: Of course, I was looking and I was like did I miss it? Did something happen? And you look a little bit closer than that, and then that! So thank you.
Fr. Robert: So folks, if you have Adobe Premiere you actually have a really good way to do an animated GIF.
Bryan: Well Padre, this is my snooty voice. Because people in the chat room are like “jiff” or “giff.”
Fr. Robert: I thought we had settled this on TWiT—shut up!
Bryan: We don’t care.
Fr. Robert: Seriously folks, you can say it any way you want. I prefer “giff” because it rolls off the tongue.
Bryan: And I prefer my peanut butter called Jif. Whatever. Thanks for showing that.
Fr. Robert: So I thought maybe now that we’ve done a little bit of Premiere, why don’t we talk about camera setups.
Bryan: Do we have time for camera setups?
Fr. Robert: Alex?
Alex: I think we can squeeze it in.
Fr. Robert: We use these sort of prosumer cameras in the studio right? And one of the things about prosumer cameras, the LCDs are okay.
Bryan: Yea, they’re super tiny.
Fr. Robert: They’re super tiny and they actually kind of wash out color. They’re not good for color representation. What we’ll end up doing a lot is just looking through the viewfinder. The viewfinder in most of these high-end prosumer cameras is actually of the same resolution as the screen. You get color representation better doing it this way. But this is a horrible way to shoot because then suddenly you’re limited from doing these interesting angle shots.
Bryan: You lose your frame of reference so you might miss something that’s going on that you want to get on the camera.
Fr. Robert: What some of us have been doing is we have been investing in these camera-top monitors that get really just a much better representation of what’s going on in the shooting world, with better color reproduction, much larger screens, with better real-world color accuracy. So I thought now might be a good time to go to a video that I shot at NEB at the Marshall booth to demonstrate what’s possible with the camera tops. If you’ve been shooting with prosumer equipment, you know that one of the biggest drawbacks is that your monitor just doesn’t cut it. That little tiny screen that may come with your camera, no matter how expensive it may be, just doesn’t give you the size, the accuracy, the color reproduction that you demand. That’s why we’re here at Marshalls to take a look at some of their camera-top monitors. Devon, thank you very much for talking to us. What do we have in front of us?
Devon: We’re looking at the Orchid 901 Broadcast Series camera-top monitors. These are going to be our most advanced, feature-rich monitors. They’re going to have way form, vector scope, audio bars, all with programmable features on them. You’re going to get peeking filters, false color filters. These give you the tools that you need to do the best shooting you can.
Fr. Robert: These are the top of the line, how much do they run? And where are they available?
Devon: These monitors depending on what version you get are going to run in the $3000-$4,000 range. These are available through any of our integrators throughout the country. You can certainly go to lcdracks.com to view the full specs on these.
Fr. Robert: Fantastic. Now these are great and these are the top of the line. But I understand that you have lower-cost units for the prosumer who just wants something to shoot with.
Devon: Absolutely. So what you’re going to see here is our VLCD 70MD. This our most popular monitor that we sell on the seven-inch series. This isn’t going to have all the scopes on it, but it does have the wave form on it. You’re going to get the audio bars on it, and you’re going to get fantastic picture, false color, as well as peeking on it. What we’ve done this year to improve upon this monitor, is over here. This is now a full-resolution 1920x1080 panel. There is no scaling in this, so you’re going to get the best picture possible with this. The flexibility of this monitor is fantastic. There are different battery mounts that are available, from Sony and Panasonic, and Tom Bauer. You also have the flexibility to change the inputs. On the back, you’re going to get HDMI inputs natively. Then we have a card-based system, where you can input 3GHDSDI, you can do cross-conversion on a monitor such as this. So it really is one of our most flexible, value-priced monitors. The VLCD70 has a list cost of $999 while our new high-resolution VLCD71 has a list cost of $1999. You can see all the specifications on these monitors at www.lcdracks.com.
Fr. Robert: Well there you have it. If you want to see more or if you want to see a smaller consumer version of this, make sure to stay tuned to our TWiT TV coverage. Father Robert Ballecer here, this is Devon and if you want to see what you’re shooting put a Marshall on top.
Bryan: Oh man, Padre. I had to wipe up some of the drool after that one.
Fr. Robert: Those are nice. But here’s the thing. Those are beautiful and I’d love to get one of those but you know, $1000-4000, I don’t have that cash.
Bryan: Maybe Leo would like to try one out.
Fr. Robert: Wait, Sarah has his credit card right? So what we thought we would do is we would show you some Marshall products, some camera-top monitors that don’t run in the $1000-$4000 range. In fact, this one runs more in the $200 range and there are actually units below this. This is a 5-inch camera-top monitor. The cool thing about this is of course I have this backwards so you can actually see what I’m doing.
Bryan: Sorry, no cameras.
Fr. Robert: The nice thing about this is it’s just so light. This thing weighs about nine ounces without the batteries. It’s using a battery pack right now that’s filled with AAs. But you could just as easily connect this to the camera battery and when I’ve been using this in shoots, one of the things I love doing is I will have this on a two-camera setup. But I’ll have the monitor plugged into the second camera, which means I can monitor both cameras from one place. I use the internal screen and I use this. It’s an incredibly flexible piece of gear. Go ahead and run that B-roll set. They can see some of the closer features, some of the things you can do with a Marshall. Again, this is the Marshall MCT5 portable camera-top monitor. It’s a 5-inch 800x40 LCD screen. It’s got 10 millisecond response time. It’s got an LED backlight and a 16x9 aspect ratio. 145 views of viewing angle from left to right. It’s got 130 degrees of viewing angle up and down. And it will scale up to 1920x1440. So any prosumer camera that you use unless it’s 4K, will look just fine on this. It will do Pal and NFTS, plus what I like about it is it’s flexible power options. You saw all the AA battery pack on the back, but you could also use an AC adapter, a 12-volt car accessory adaptor, a camera battery adaptor. It pulls about 7 watts of power which means on six AA batteries it will provide about 2.4 watts of discharge, lasting about two hours.
Bryan: That’s usually about the recording time that I would do on something but what I like about it is you can attach it because it’s so small and light, you can attach it to a DSLR.
Fr. Robert: Exactly. People using DSLR, his is absolutely perfect. It has HDMI in and out which is why I could pass from the camera to the monitor, out to the TriCaster. Also composite in and out as well as a 2-watt speaker, 3.5mm audio out jack. So you could have this as your producer monitor just listening to what the cameras are picking up. It also does mounting points at the bottom and top of the monitor which is something that a lot of the cheaper models don’t do. Because sometimes I mount it from the bottom, but sometimes I mount it, as you seen on those videos, on a hanging arm. With the weight just over 9 ounces, it just feels nice and light. That’s my two-camera setup with the monitor being used to see what the second camera is seeing. Which means I can run a two-camera setup by myself. It gives you all the controls for the brightness, the contrast, the hue, the color saturation. You can change color temps if you want to match a shooting condition or if you know you’re going to be color-correcting later on. You can also zoom in on a particular piece of the frame which is kind of nice if you want to see what a camera is looking at. And again, this particular model you could find, I think between $220 and $250.
Bryan: For those solo shoots, multi-cam shoots, this seems like an essential part of the kit that you’d want to have together.
Fr. Robert: Right. Now reevermike in the chat room has a good point and he’s like who wants to shoot with all that stuff attached to the camera. Normally, I’m like that.
Bryan: Yea, I’m used to having shotgun mics and all sorts of stuff attached to the camera like that.
Fr. Robert: It’s nice to have everything self-contained but you get to the point where you don’t just want the quick gorilla shot. You need something that actually looks good. And you’re not going to get that off the internal LCD monitor of a camera. As good as these may be, there just too small, they’re not really designed for accurate color reproduction which means you’re going to get in the studio later on. You’re going to have to do post-processing color fixing. Just avoid that, get something like this. I don’t have it on all the time. In fact, most of the time I’m not running with this, but for $200 that’s something that I’d like to have in my kit.
Bryan: Especially for multi-cam but I could see using this with my DSLR to make sure things are in focus because the screen on there is tiny. And it’s like it look fine but when I get it blown up to 1080 on my monitor…
Fr. Robert: And you’re like oh! Exactly. That’s the thing I really really hate. When you’re shooting something and you get it back to the studio and now you’re on a 24-inch monitor instead of a 2-inch monitor and you realize that this part was out of focus or there’s a small oh no, that got into the frame.
Bryan: It’s like the Instagram effect. You take an Instagram picture and say yea it looks good on my phone. And then you blow it up on your computer and you get a print out of it and it’s like, it’s super-grainy.
Fr. Robert: And actually, SSAP is saying the right thing, is that you need the info to make the right shooting decisions. That’s what this does. I would say put this in your gear box and have it ready to give to someone to watch as you’re shooting. Give it to your producer so that your producer can actually look at those details as you’re doing your job, as the cameraman.
Bryan: Absolutely. I like it.
Fr. Robert: I like it. Marshall, now that we’ve taken a look at this, now if you could send us the 4K camera.
Bryan: If one happens to fall off a truck and land at our front door, that’s cool.
Fr. Robert: Speaking of one landing at our front door, this is a lot of information that we covered. Everything from the Mac OS10 tips to the Adobe Premiere tip, to this. All the information where you can get something like this.
Bryan: We’re going to need notes for that.
Fr. Robert: We are.
Bryan: And you can find those too on the internet.
Fr. Robert: Where?
Bryan: At twit.tv/kh where we also have a list of all of our former episodes and you can go through the show notes, find links, information, find steps for OS10 tips. When Padre does his Windows 8.1 tips, it’s going to say don’t install Windows 8 on the show notes. I’m working with a bunch of Windows men.
Fr. Robert: Why must you be my screen door?
Bryan: I love Windows. Anyway, there’s the webpage. We make everything available. You can watch the episode again or subscribe which would be great too.
Fr. Robert: Yea, you can find a way to get our episodes on any device of choice. You can get the audio version for the ride home. You can get the high definition version for your Roku at home, or you can get something in the middle for your tablet. We do it because we love you. Also you can email us at knowhow@twit.tv. That will not get to us at all. In fact…
Bryan: Unless you compliment Padre on his looks. And then he’ll read it out on the episode.
Fr. Robert: That’s because she actually found my real email address. Which again, I don’t know how you did that Melody, but awesome. Well done.
Bryan: Clever girl!
Fr. Robert: But the best way to get a hold of us is on our G-plus page, right Bryan?
Bryan: That’s right. And you can see Padre’s really freaky angel post. We have over 6000 people on the Google Plus community and there’s a lot of great ideas being passed around out there. So you can submit show ideas for ideas or show us your projects which we would love to show on this show.
Fr. Robert: And remember, we do that feedback thing once a month so if you get good questions or pictures of your projects, we’re probably going to feature you. You can have your little moment in the know it all group.
Bryan: It’s almost like you’ll be part of the team.
Fr. Robert: Like right here.
Bryan: Except for Alex. He’s not part of the team.
Fr. Robert: Speaking of Alex, could we go back to him. Alex, did we fit everything in the right amount of time.
Alex: I think we did it just right.
Fr. Robert: You’re not going to press the destroy planet button again?
Alex: Not today.
Fr. Robert: Thank God.
Alex: I do have another special button that I’ll wait until the end of the show.
Bryan: He’s going to blow us up.
Fr. Robert: Oh great. Well until we get blown up, I’m Father Robert Ballecer, you can find me at twitter.com/padresj.
Bryan: And you can find me on twitter at cranky_hippo.
Fr. Robert: And now that you know…
Bryan: … go do it!